Travel Photography

Return to Little Cayman

I recently returned to Little Cayman on a trip with my home-base dive shop, Atlantis Aquatics. Little Cayman is one of my favorite dive destinations and truly is a showcase of the Caribbean’s greatest hits: sea turtles, groupers, stingrays, nurse sharks, and reef sharks are common sightings, as are smaller critters like spotted drums, sea slugs, “disco” fish, and cleaner shrimp. 

Most people who visit the Cayman Islands stay in Grand Cayman, the largest and most commercialized of the three islands. Just eighty miles east of Grand are the sleepier sister islands of Little Cayman, and 15 miles further, Cayman Brac. They are remote and undeveloped: no corporate hotel chains, Starbucks, or movie theaters here. These destinations are for people who want to scuba dive, fish, or just disconnect. 

Flying to Little Cayman reminds me of travel in the Alaskan bush or the Costa Rican rainforest - small props landing on remote airstrips

Visitors arrive in Little Cayman on a deHavilland Twin Otter— a dual-engine, 18-seat, propeller plane — that departs Grand Cayman and lands thirty minutes later on a tiny airstrip nestled between mangroves and natural coastline. One narrow ring road traces the circumference of the island — you could drive it potentially without seeing any other vehicle traffic. 

For this trip I opted to keep the photography kit relatively simple with a one lens wide-angle setup only: my Canon EF 16-35mm F/4L IS lens on a Canon R5 body. I took it underwater in a Nauticam housing with two Sea & Sea strobes. (All of my gear, incidentally, is purchased at Backscatter — and they have presence teaching underwater photography courses at the dive resort where I stayed on Little Cayman.) Although there is plenty of macro life to see in Little Cayman, I find that diving with a group of divers following a dive guide means we don’t spend much time in any given spot, which makes macro photography difficult. Going with a group of other photographers (or diving with only your buddy) is a much better arrangement for macro photography. (Want to learn more about wide-angle vs. macro photography? Check out this video)

One of my goals on this trip was to seek strong subject separation. I have many photos of turtles and barracuda blending into the reef, so on this trip I was hoping to make them “pop” more distinctly in my images. Too often turtles photographed against a reef are overtaken by the busy background, almost camouflaged into the complex array of corals.

A hawksbill turtle flies over the reef. I like this image because there is subject separation so the turtle really stands out. It also clearly shows action and movement. 

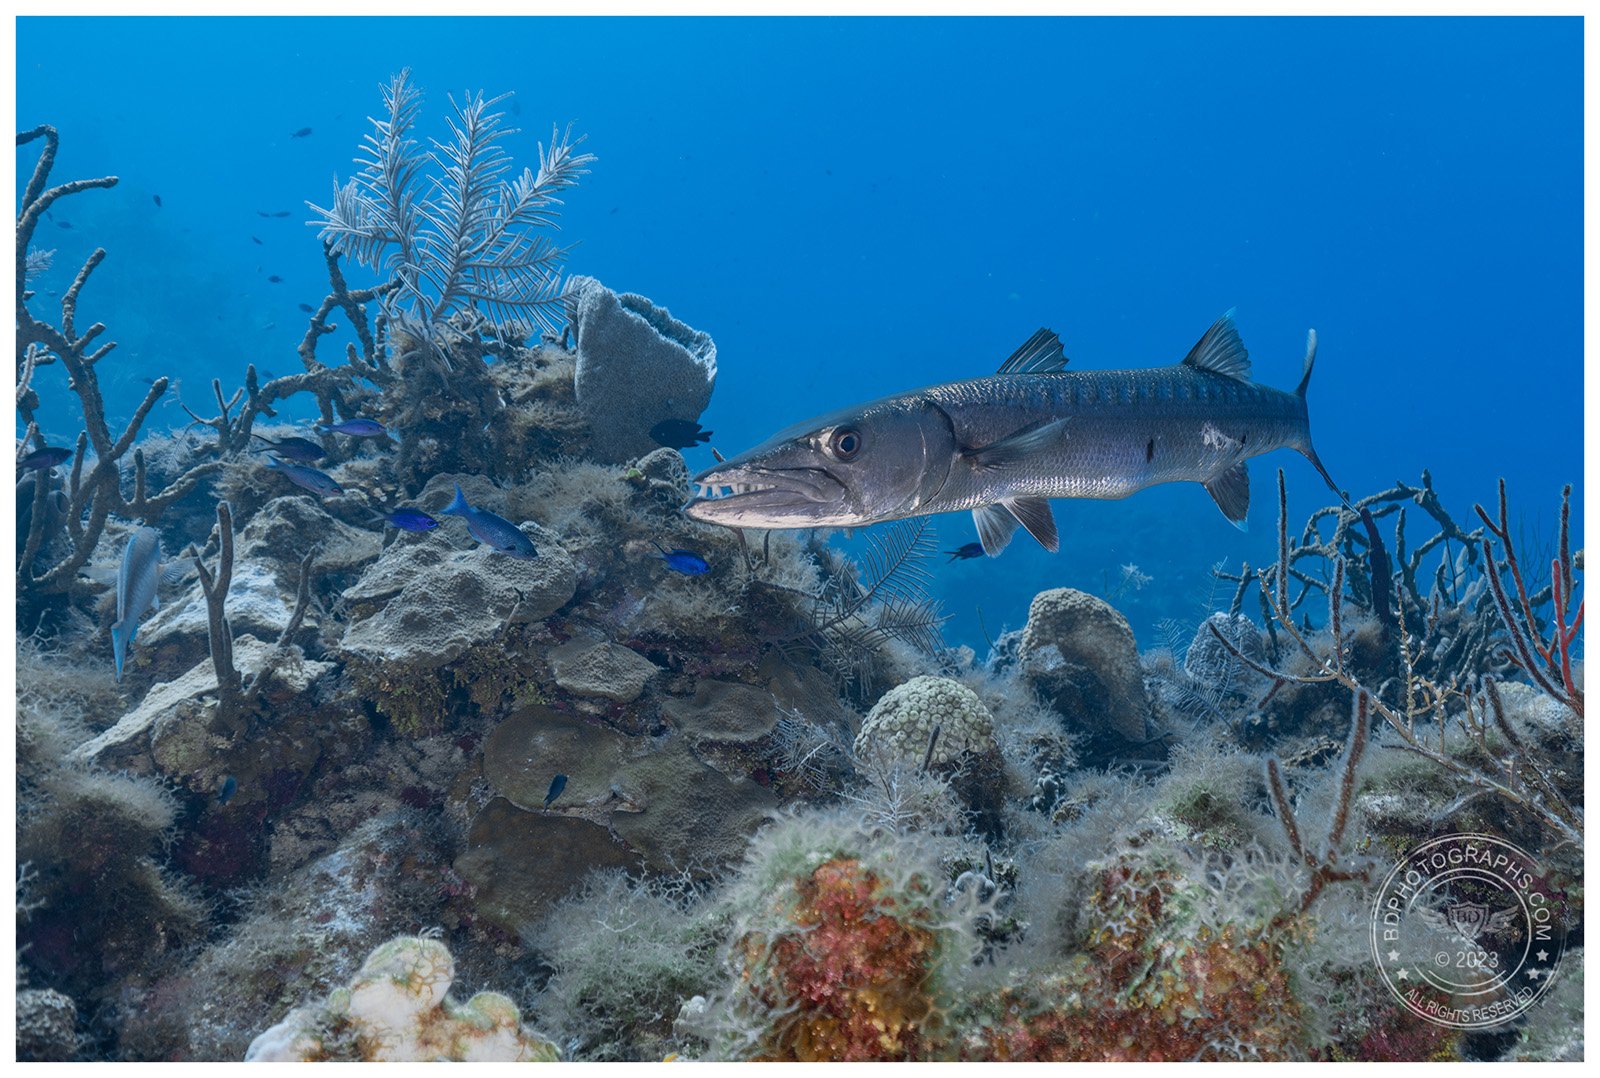
A great barracuda displays its menacing teeth. Once again, there is good subject separation so it does not blend into the reef. This was shot on the edge of one the of many coral fingers 

To achieve subject separation on the reef, the photographer must be lower than the subject and must approach at an upward angle — not easy to do without trampling on the fragile corals, which is of course absolutely forbidden. The trick to this type of shot is to look for subjects near the edge of a slope, coral head, or wall where you can easily dive lower than your subject without touching the reef. 

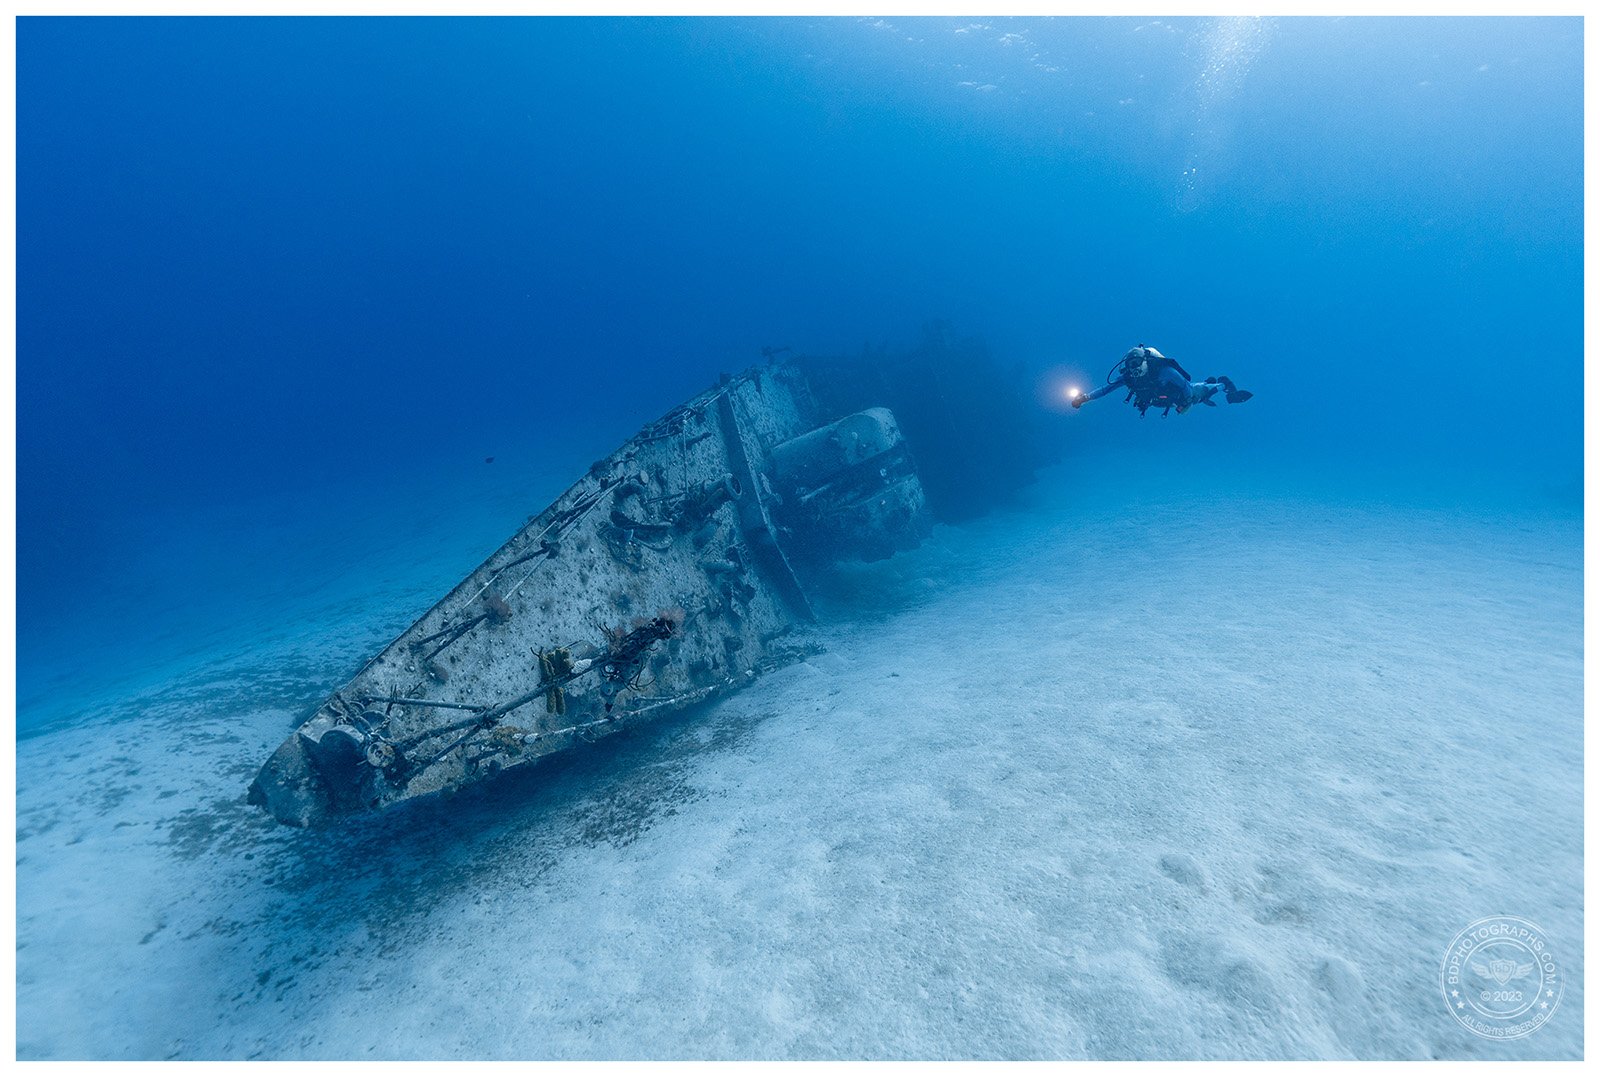
Another goal was to visit a well-known shipwreck in Cayman Brac. On my last visit to Little Cayman this wasn’t an option, so I was excited when the captain proposed a trip (weather permitting) out to the Brac to dive this wreck. Transit time was about 50 minutes in moderately choppy seas, but the bouncy ride was well worth it. The M/V Keith Tibbets, formerly a Soviet destroyer built for Cuba, rests in clear water on beautiful reflective sand. The shipwreck is extremely photogenic, with its forward turrets clearly visible. It is about 90 feet down to the sand, but divers who don’t want to go deep can explore the shallower starboard side at about 60 feet.  

The M/V Keith Tibbets, formerly a Soviet destroyer built for Cuba, was a highlight of this dive trip

One topic of debate in diving is whether it is permissible to kneel in the sand. Some dive operators allow it as long as it is done with care; others do not permit it and ask divers to remain buoyant above the bottom. On this trip we were asked not to kneel on the bottom so stingray shots were a bit more challenging, but not prohibitively so.

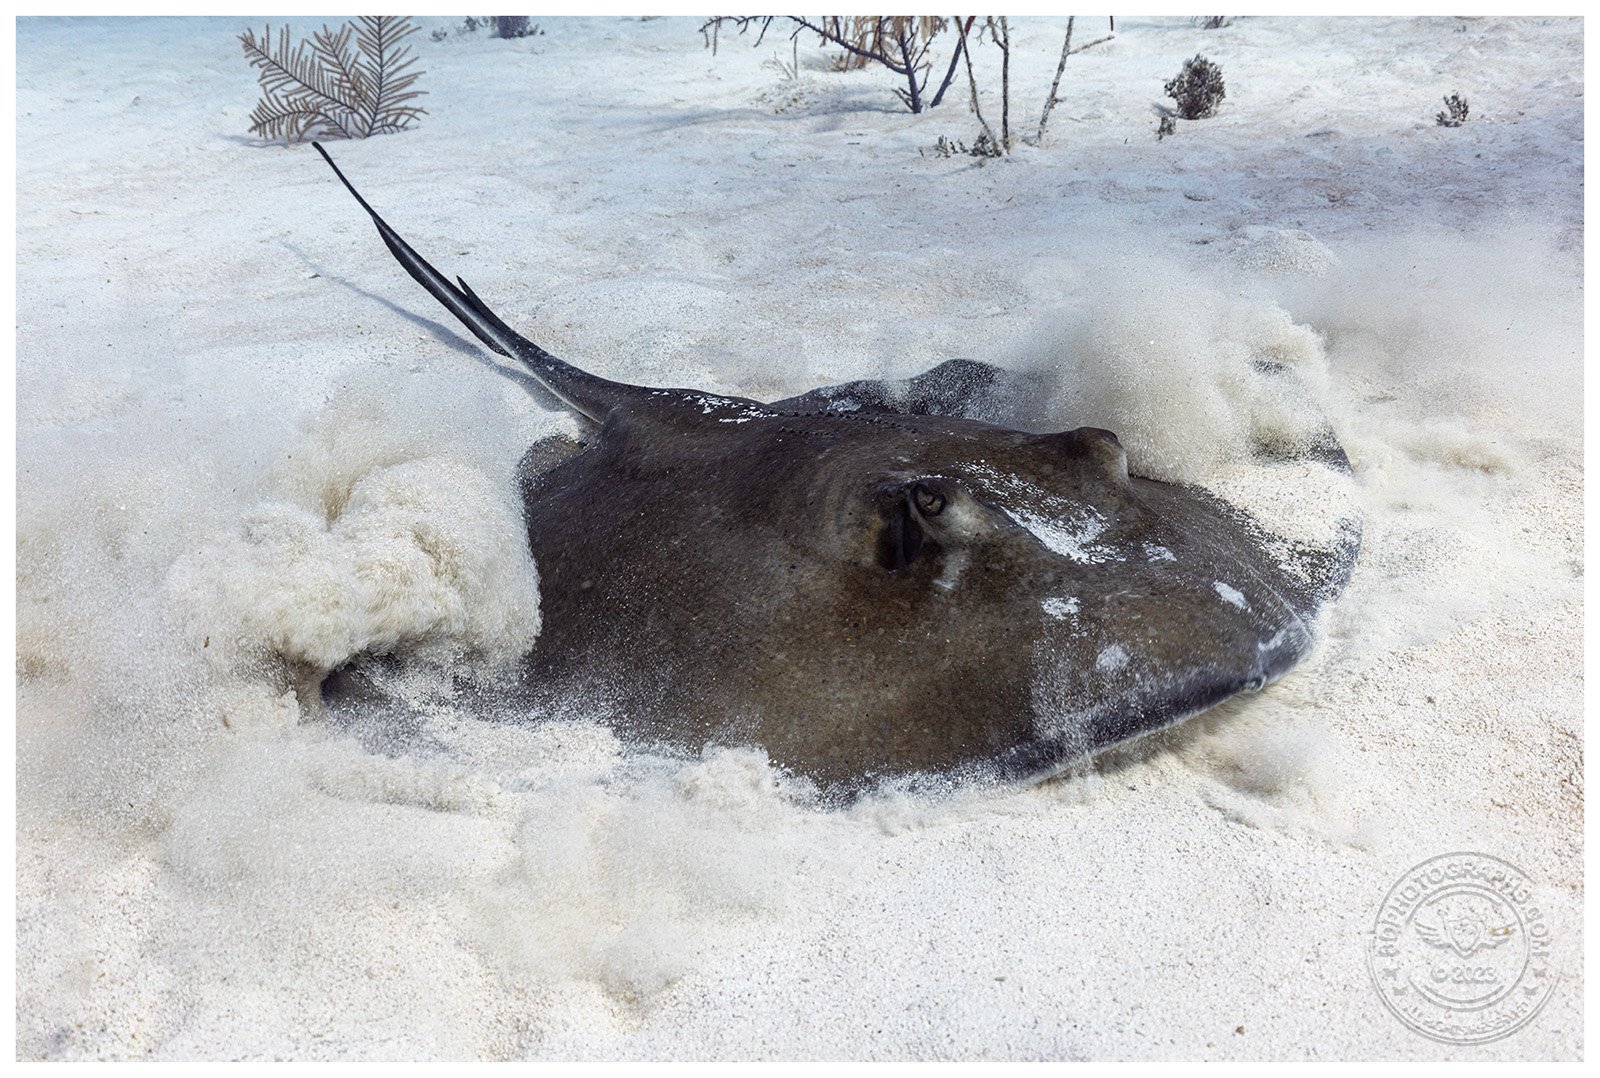
This was my favorite stingray encounter. It’s fairly common to see rays gliding across the sand, or buried on the bottom, I caught this ray in the process of swirling up the sand and digging itself in. 

We had several stingray encounters, and it is remarkable that each ray had its own personality. One was feisty and irritated, more so by the bar jack that was tracing its every movement than any encounters with us. Another was skittish and seemed to take off whenever we got too close. And then there were two others who were very tolerant of our presence, posing in the sand unencumbered even as a group of three of us approached with our cameras. It truly is a pleasure when a subject is cooperative, and it’s no surprise that the best images are achieved when the animal is calm and unbothered by our interactions. 

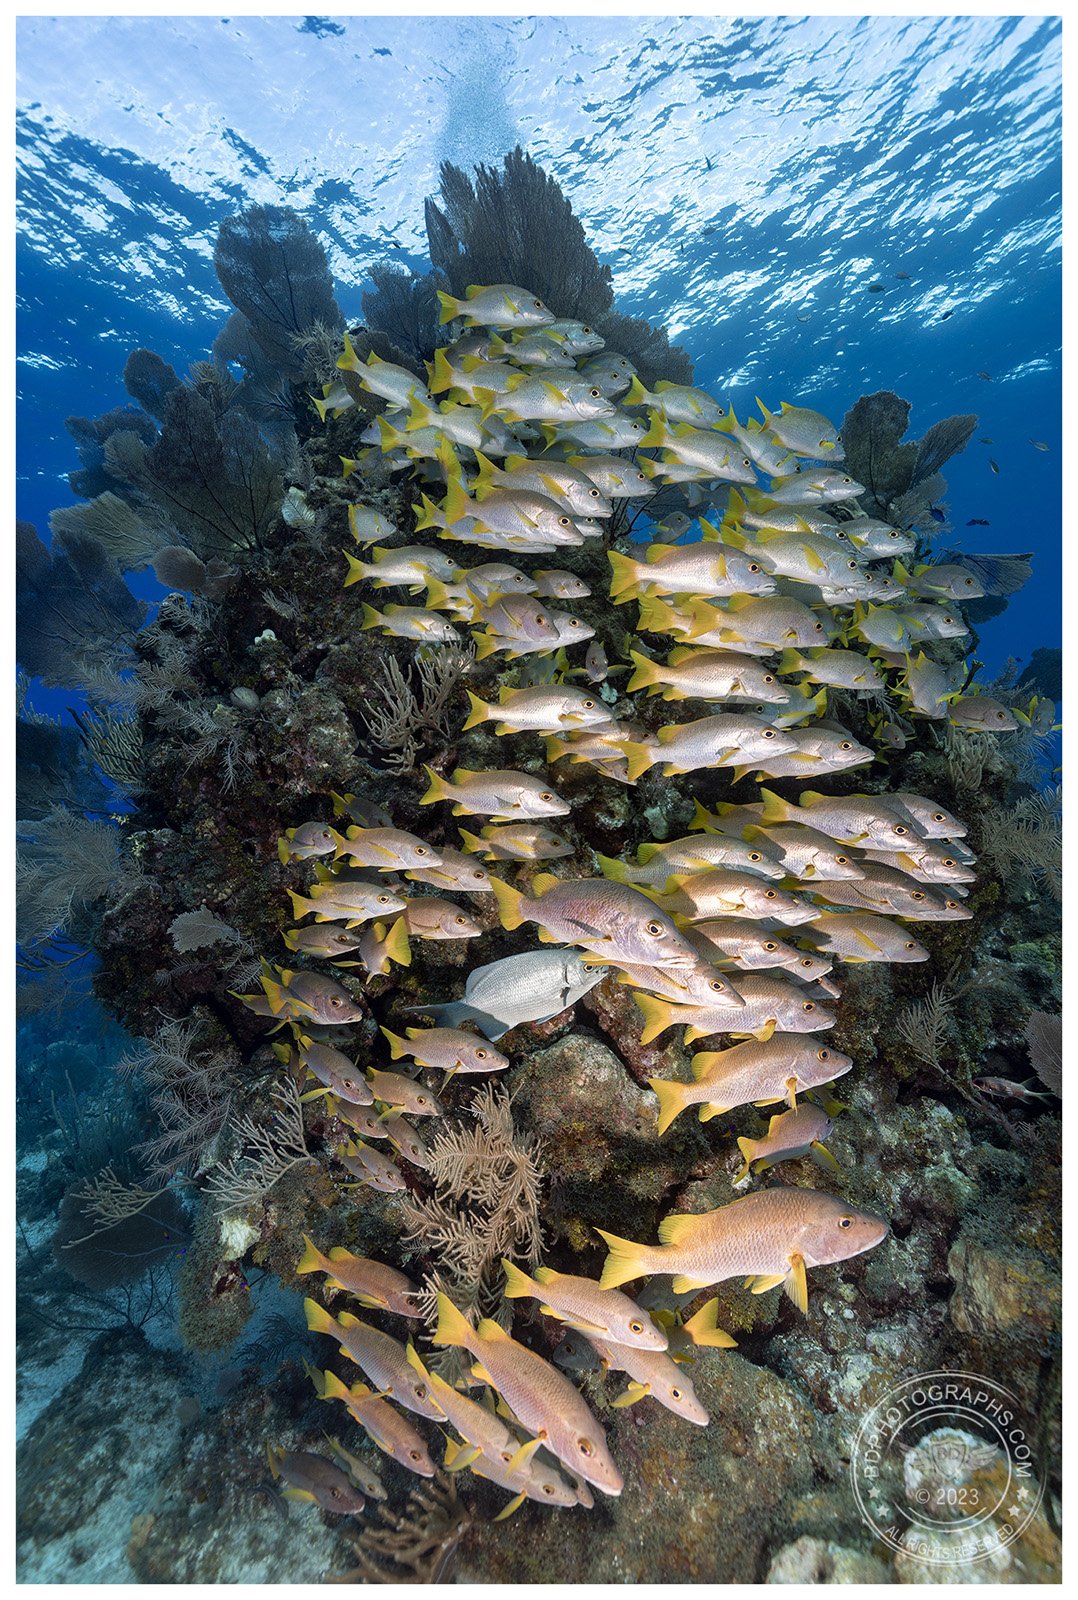
“Schoolmasters’ Tower” is my favorite image from this trip. Here schoolmaster snapper (Lutjanus apodus) rest in the lee of a coral head. If you look closely you can spot a Bermuda Chub and a squirrelfish tucked in among the snapper.

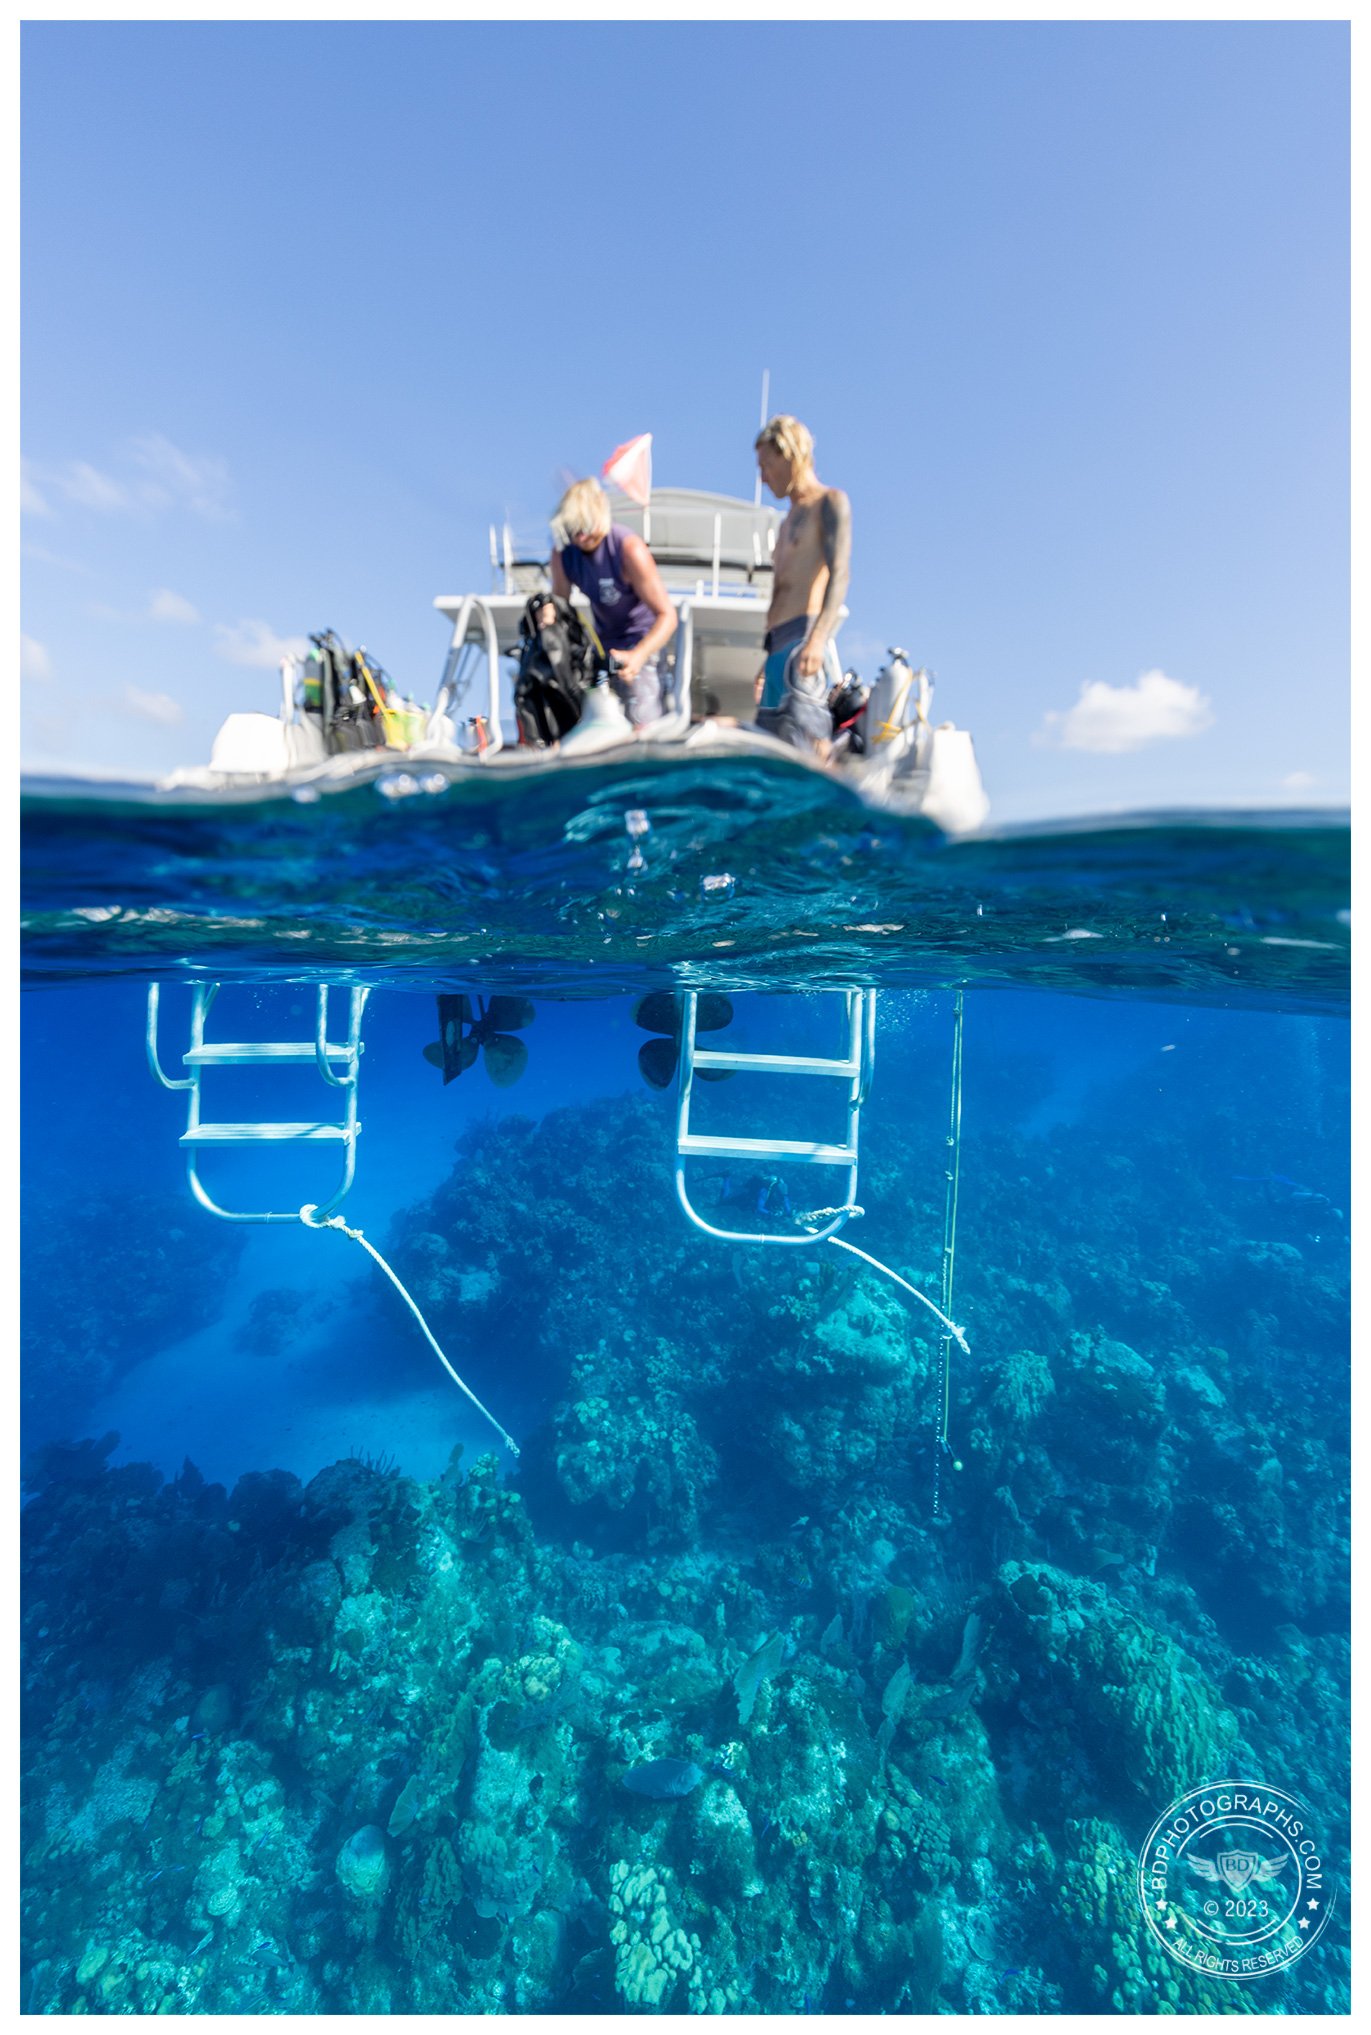
This is really a snapshot split, meant to document the experience of getting back on the boat. Divers are privileged to see a completely different world underneath the surface

With the exception of south Florida, I rarely revisit dive locations within 5 years — there’s always somewhere new or different to explore before recycling old favorites. Little Cayman is an exception, and will continue to be owing to its reliability as an outstanding Caribbean dive destination. See you again soon!


If you are interested in learning about underwater photography, or experiencing some close-up behind-the-scenes encounters with sharks, dolphins, crocodiles, check out my YouTube channel.

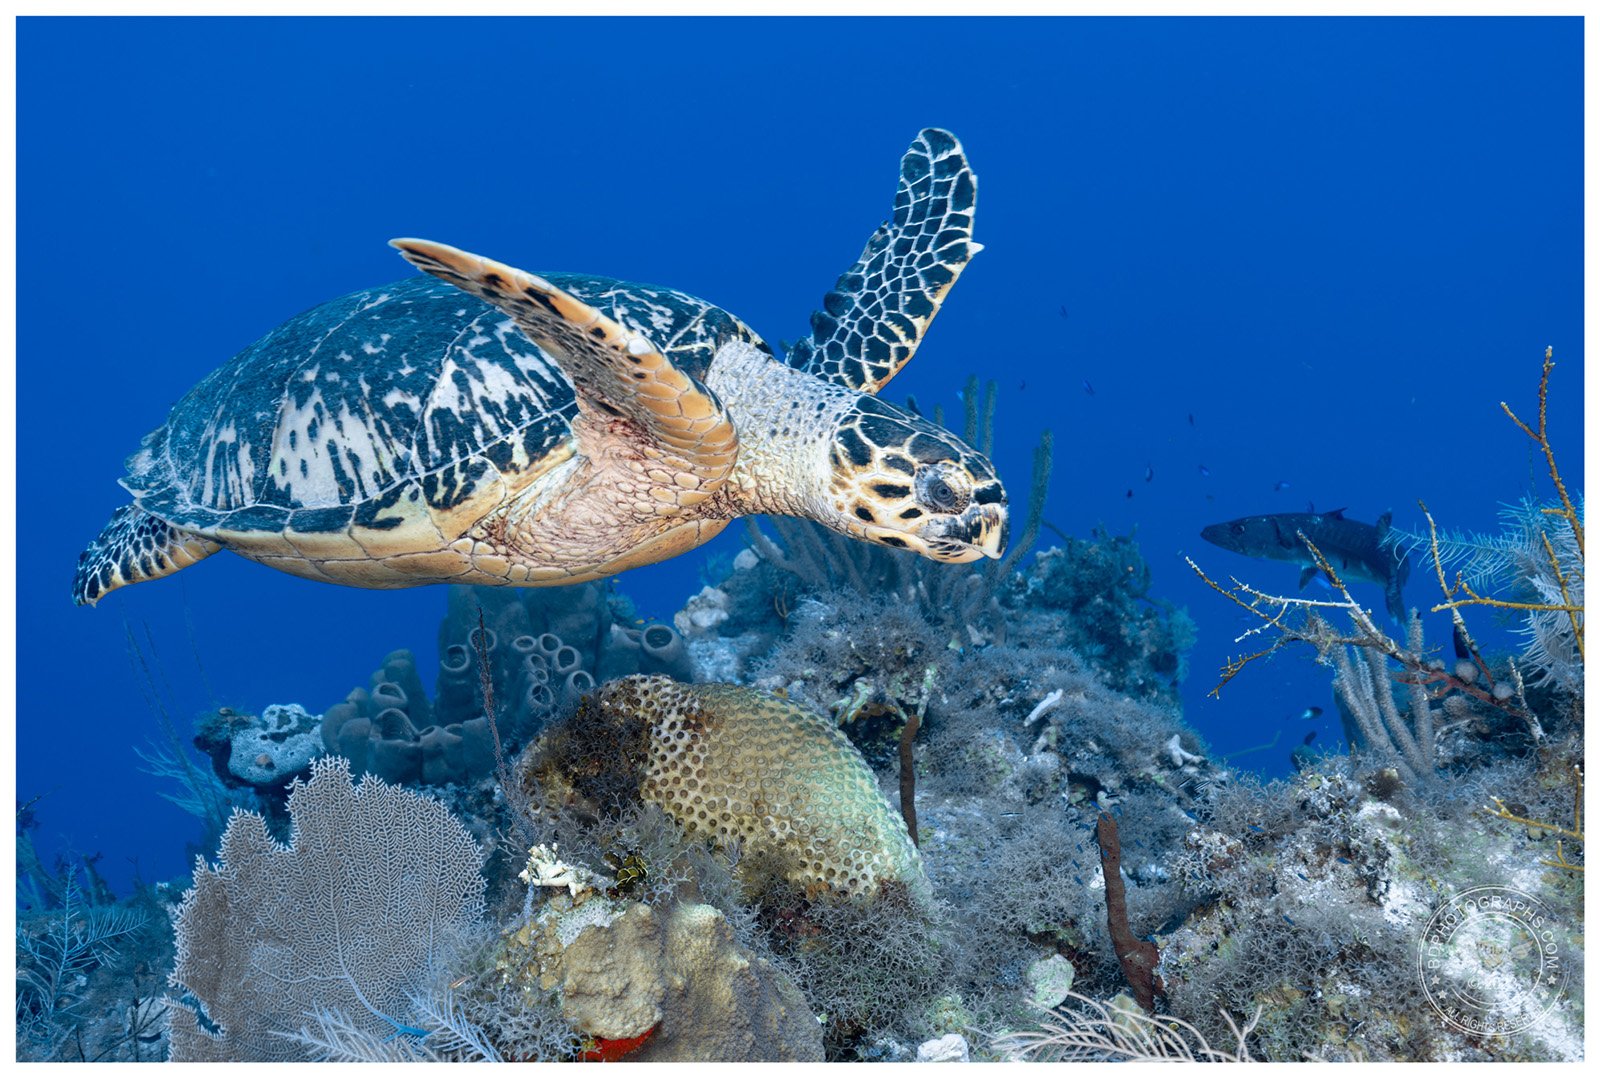
Photo Wonders

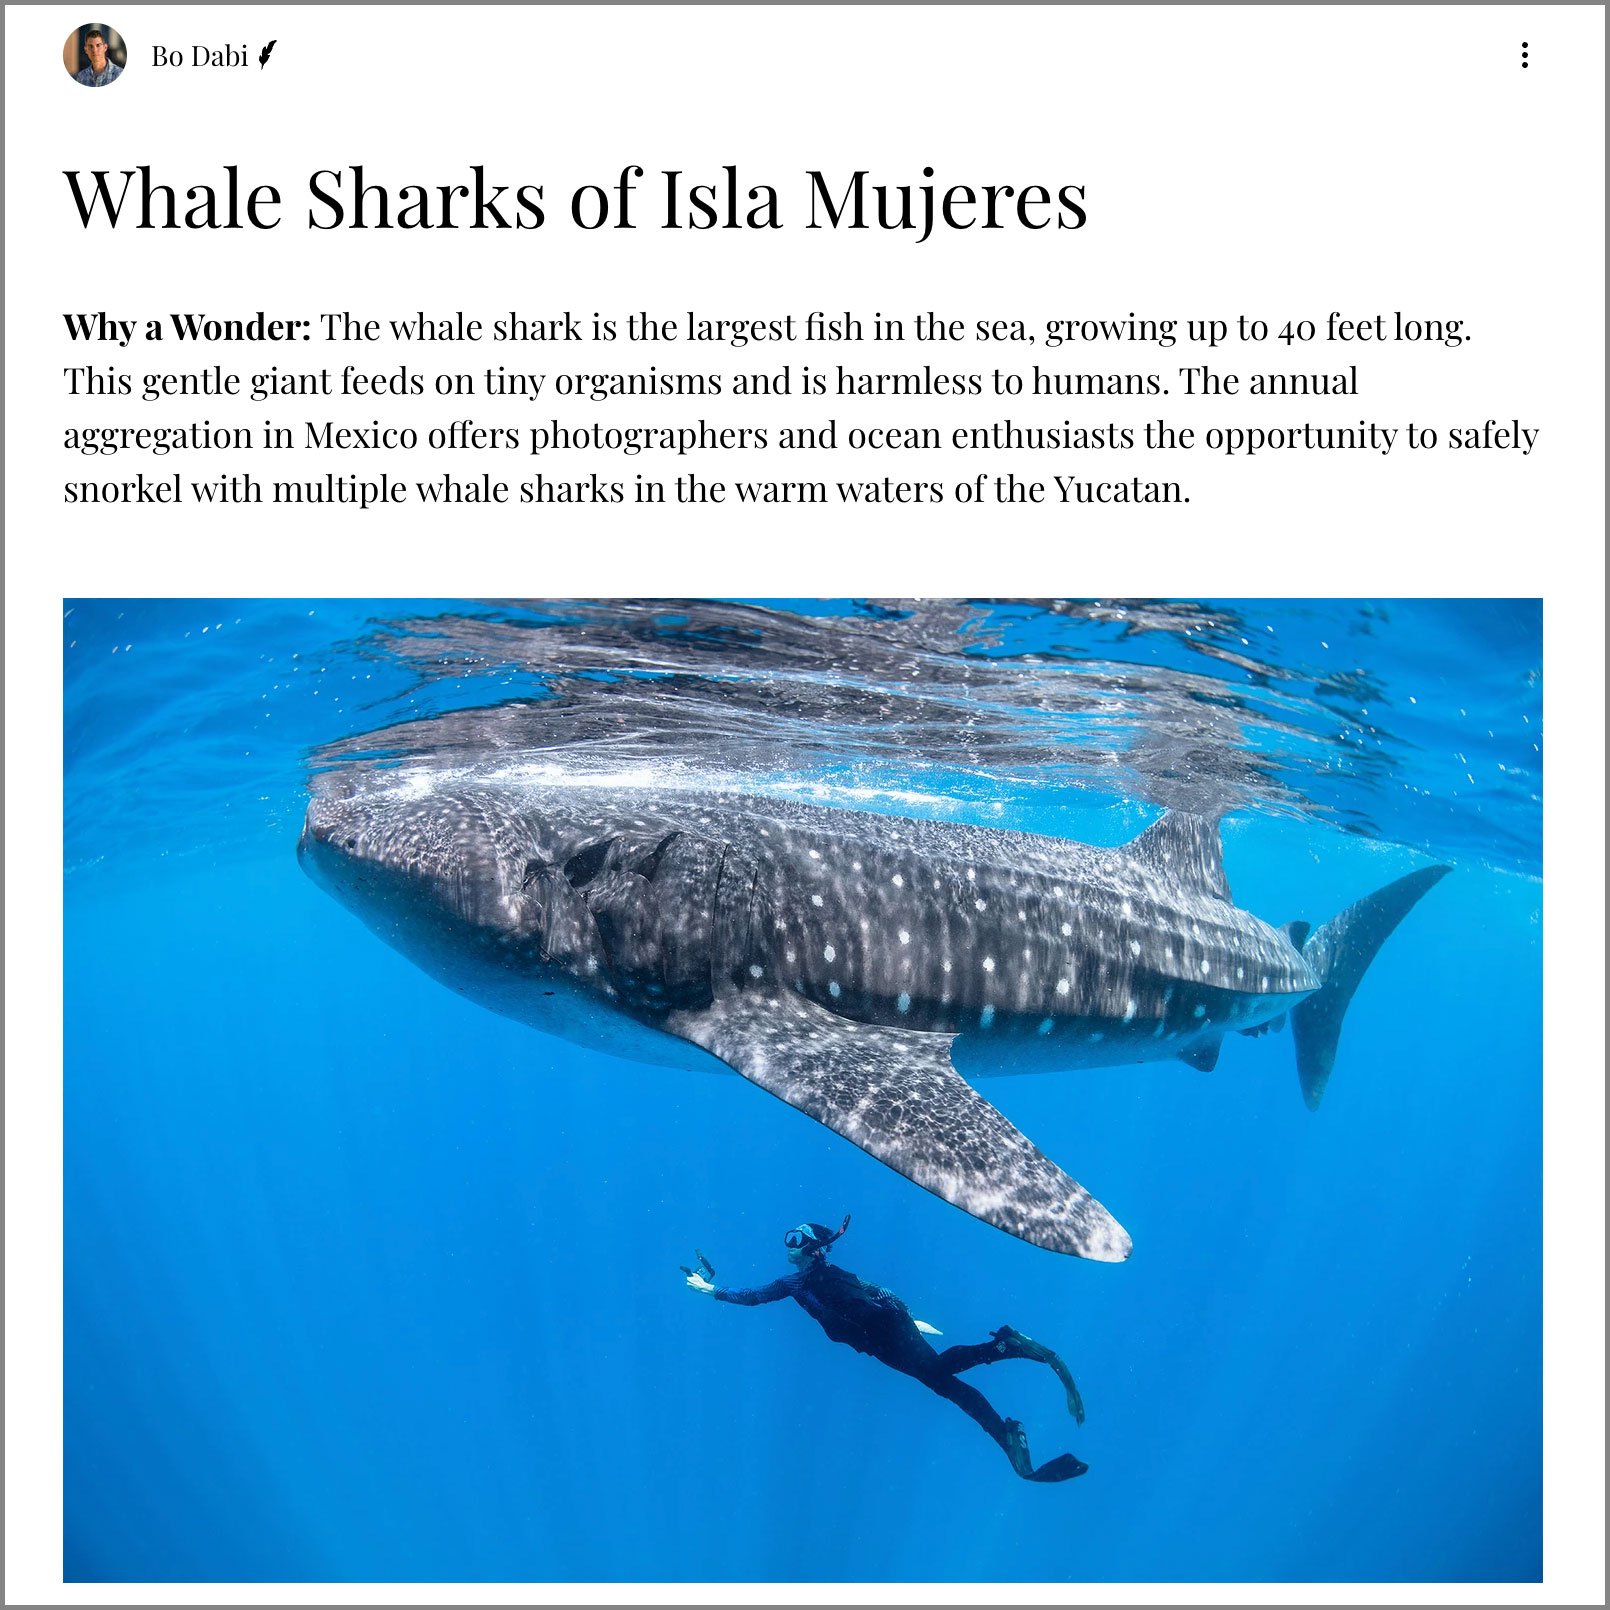
Here’s a recent write-up I contributed to Photo Wonders with some original photos of the world’s largest fish — the whale shark. Photo Wonders is an inspiring and informative website with a focus on travel photography including landscapes, cityscapes, culture, and wildlife. Professional photographers share valuable details about places to visit, when to go, gear and settings, and how to get the best images. Lots of great content there — check it out! [Update: as of Jan 2024, Photo Wonders is no longer an active web site]

This and many other articles are featured on Photo Wonders

10 Reasons Why You Should Book an Ecotour

For many people an African safari is the ultimate ecotour. Not all safaris are the same so it’s important to do some research about the types of animal encounters you can expect in different places.

For many people an African safari is the ultimate ecotour. Not all safaris are the same so it’s important to do some research about the types of animal encounters you can expect in different places.

Ecotourism is a broad category of tourism that focuses on natural environments and typically supports conservation efforts. If you think that sounds fairly dull or too academic, think again. Often ecotours seek sightings of specific wildlife, and sometimes they require travel to the most remote places on the planet. Some may mean roughing it in the bush, while others pamper you with Michelin-starred cuisine and luxurious accommodations. Some ecotours are open to large groups — cruises to Antarctica, for example — while others are exclusive to just a few people. Ecotours can be inexpensive day trips or very pricey and lengthy excursions — or anything in between. Whether it’s an African safari or a visit to the polar regions, one thing is for sure: ecotours are some of the most thrilling and memorable trips you’ll ever take. Here are 10 reasons to book one:

1) Animals roam free. It’s the opposite of visiting a zoo: you get to go in a secure place while observing animals in their natural habitat. On most African safaris, a few guests will be driven in open vehicles to different locations where animals could be. A tracker and ranger work together to locate the animals — they could be in many different places at any time — and part of the fun is finding them. Other ecotours may have you enter a “blind” which is a shed or similar structure that has been built into the natural environment to allow observation with minimal disturbance to the animals. Underwater dive trips typically put divers or snorkelers in open water with wildlife, or in some instances in a cage to safely observe sharks. On many trips, proximity to the animals is astonishingly close and photo opportunities are plentiful.

2) Avoid the crowds and selfie sticks. If you’ve been to Paris or New York in the last ten years you know there’s almost no such thing as low season. Tourists are everywhere, museum queues are endless, attractions are over-crowded, and Instagram is saturated with the same selfie a million times over. Ecotourism usually limits the human impact on a place by restricting the number of people who can visit. Sometimes this is achieved by a lottery, by limited spots, or by prohibitive cost.  

For scuba divers ecotours are the most common type of trip. There are many options: day trips, week-long dive packages at resorts, and live-aboard boats (which are essentially dive cruises). Live-aboards have the advantage of being able to reach rem…

For scuba divers ecotours are the most common type of trip. There are many options: day trips, week-long dive packages at resorts, and live-aboard boats (which are essentially dive cruises). Live-aboards have the advantage of being able to reach remote dive destinations.

3) It helps to keep animals alive. There’s a controversial cliche in the economics of ecotourism: “if it pays it stays” — the concept that wildlife is worth more alive than dead, and used to promote tourism over hunting or exploitation of animals. This has worked wonders in parts of the developing world where communities have shifted from an unsustainable extraction economy to a renewable one based on ecotourism (e.g. manta ray tourism in parts of southeast Asia). The problem with this of course, is that while many people will pay high sums to see “popular” animals such as lions and polar bears, almost no one will take a tour to see the endangered Greater Sage Grouse which is severely threatened by habitat loss. Will anyone really infuse cash into saving an ugly but important insect on a different continent? Unlikely. Nonetheless, every dollar supporting ecotourism helps the industry to grow while boosting the economic value of the animals and their environment. The hope is that as an environment becomes more valuable, all species within that environment will be protected and preserved. 

4) You can meet interesting people. Ecotours are a great way to meet other people who share your passions for nature, travel, photography, or other interests. I speak from experience having met some incredible people from all over the world on various trips. Sometimes you can meet people in faraway places and discover you actually live near one another. 

Seeing big animals often requires travel to remote areas. The brown bears of the Alaskan peninsula are some of the largest the world.

Seeing big animals often requires travel to remote areas. The brown bears of the Alaskan peninsula are some of the largest the world.

5) Disconnect and go off the grid. Ecotours sometimes require travel to very remote places. Some of these locations are beyond reach of cellular service or wifi — think remote mountainous regions, or excursions at sea. This is a great excuse to unplug and go offline. You’ll find the break from daily news, email, and social media refreshing. 

6) You’ll have rare visibility into natural animal behavior very different from the myths and drama on television. While on safari I was surprised to learn that African lions, whom we think of as majestic predators, scavenge as often as they hunt; and that hyenas, whom we think of as scoundrels, actually hunt more often than they scavenge. Seeing animals in the wild often shatters the myths that popular culture has created around their personas. One word of warning: nature is not always pretty, especially when an animal is hunting its prey. Natural predations are sanitized on television to appear much quicker and cleaner than they actually are. In real life, a kill can be a lengthy and bloody affair. 

Nature can sometimes be difficult to watch. In South Africa’s False Bay, early morning ecotours observe natural predations by great white sharks on seals.

Nature can sometimes be difficult to watch. In South Africa’s False Bay, early morning ecotours observe natural predations by great white sharks on seals.

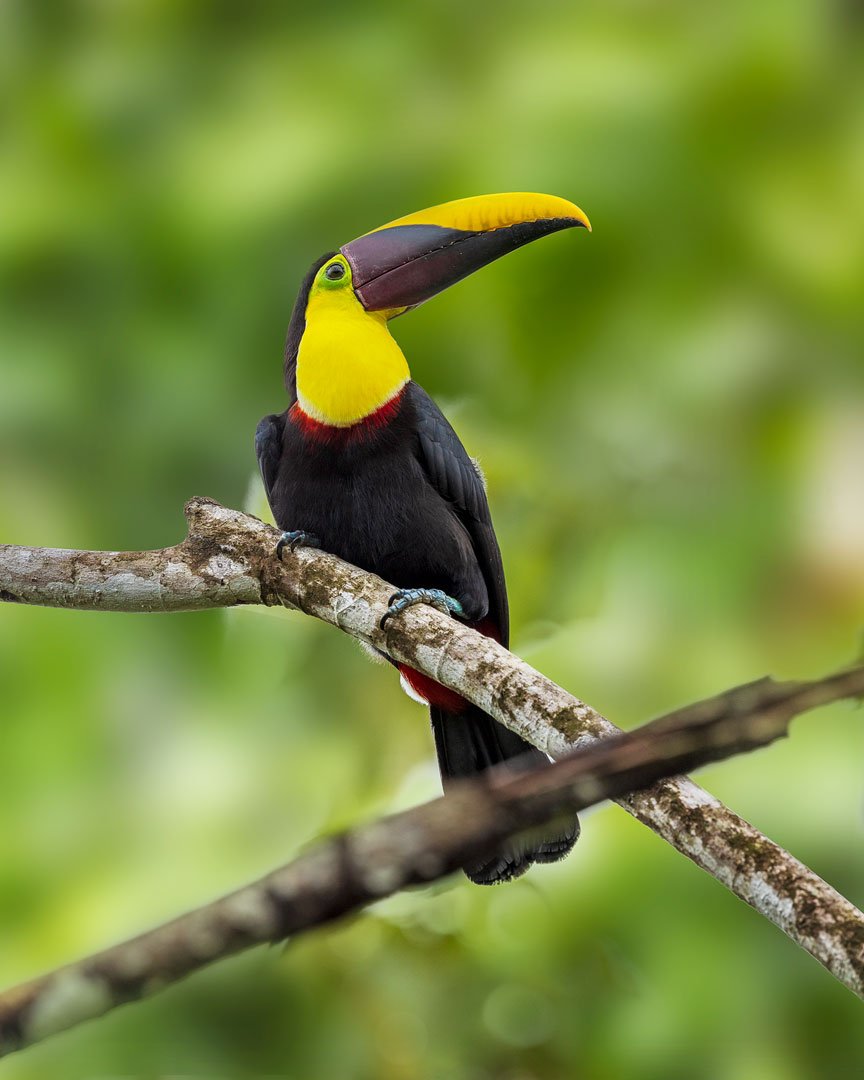
Birdwatching takes on a whole new meaning in the rainforest, with many beautiful and charismatic species

7) Immersion in nature. Ecotours may take you to some of the last unspoiled areas on earth. Whether you are visiting the backcountry of Alaska or a local nature reserve, you will see places that are a little bit closer to prehistoric times without the encroachment of human civilization. There was a time when animals roamed the earth in abundance. Ecotours show you glimpses of that world. 

8) Unique photo opportunities. Imagine yourself in places with the opportunity to capture photographs most people dream about. For nature photographers, ecotours provide access to capture images most people will only see on television or in magazines. 

9) Memories for a lifetime. I cannot overstate how special it is to witness nature. You will never forget the first time you see your favorite animal in the wild. You’ll remember the sights, sounds, and smells, and possibly be surprised just how big — or small — that animal really is. 

Ecotours need not be formally organized or expensive. A visit to a local wildlife refuge or nature preserve can provide excellent wildlife viewing opportunities. Talk to a ranger or local biologist for tips on when and where to visit. In New Mexico’…

Ecotours need not be formally organized or expensive. A visit to a local wildlife refuge or nature preserve can provide excellent wildlife viewing opportunities. Talk to a ranger or local biologist for tips on when and where to visit. In New Mexico’s Bosque del Apache Wildlife Refuge, winter is prime season to observe sandhill cranes and many other birds.

10) You become part of the conservation movement. I’m not suggesting that every visitor to an ecotour is automatically an activist, however, by participating in ecotourism you are voting with your dollars in support of conservation. By sharing your photographs and stories with others, you become an advocate — without necessarily being political — for animals and nature.

The short summer in “downeast” Maine is an opportunity for Atlantic Puffins to raise their chicks. Ecotours to Machias Seal Island — which is disputed land between the US and Canada — run daily from June into August.

The short summer in “downeast” Maine is an opportunity for Atlantic Puffins to raise their chicks. Ecotours to Machias Seal Island — which is disputed land between the US and Canada — run daily from June into August.

A few more considerations, now that you’re convinced … 

  • Remember that most ecotours are seasonal, though some run year-round. Many major ecotours require advance planning, sometimes a year or more ahead of the trip date. A week in the Serengeti or Galapagos almost certainly will be booked a year or more in advance. Most ecotours take a deposit to hold your spot and require payment in full before the trip date. Look closely at the cancellation policies and determine whether you can commit. Trip insurance is a must — consider it a protection of your investment. 

  • Be wary of and avoid unnatural entertainment disguised as ecotourism. The most common example is the “conservation petting zoo” that allows you to pet or hold potentially dangerous animals such as tigers, lions, or wolves that have been habituated and sometimes drugged to permit interaction with people. Often these attractions will have baby animals as their big sellers (who wouldn’t love to cuddle a tiger cub or a wolf pup?) I won’t go into all the dark places these operations dwell but I can assure you the hidden side to these businesses is not pretty. 

  • Before your trip, consider visiting a local zoo to practice your wildlife photography skills. Better to find out your shutter speed is too slow before your big trip. I recommend sticking to zoos that are AZA Accredited. It’s not a perfect guarantee, but it does help to steer you toward operations that value animal welfare and ethical practices.

  • Know that while some ecotours can be very expensive, there are opportunities for most budgets. If a two week safari is not feasible right now, a half-day whale-watching trip could be an option. Camping is an affordable way to visit many national parks and has the added advantage of being much closer to the attractions than many lodges and hotels.  

The Shot: Railroad Village

The Shot: Railroad Village
Location: Taiwan
Techniques: Hand-held shooting, shutter speed, weather
Recommended knowledge: Understand the exposure triangle. Manual mode: setting your camera’s aperture, shutter speed, and ISO. 


The final shot. The historic town of Shifen is about a 40-minute drive from Taipei

The final shot. The historic town of Shifen is about a 40-minute drive from Taipei

If you bring your camera with you in your travels - whether it’s an overseas vacation or a day trip to a local park - it’s likely that you’ll be without your tripod for at least some of the time. Sometimes it’s not feasible to carry a tripod, especially in a place where it’s simply not permitted to do so (museums, churches, etc.). Or maybe you’ll opt to leave the tripod at home and lighten your load. Street photographers work almost exclusively without tripods, as do many photojournalists and some portrait photographers. Even if you’re a landscape photographer with unshakeable allegiance to the three-legged stabilizer, hand-held shooting is an important skill to learn for those unplanned moments when a tripod isn’t set up or available. 

FORM

The two most important technical considerations in hand-held photography are form and camera settings. In general, you’ll want to hold the camera with two hands and keep your elbows tucked in. The idea is to keep the camera stabilized with your body, effectively weighing it down. You’ve probably seen photographers hold the camera in one extended hand, using the display screen to focus, as they rattle off a bunch of shots. This is about looking cool while taking pictures but does nothing to improve the photo, and for most people will lead to poor results. If you are a portrait photographer using flash and fast shutter speed you could use this technique to look slick, and possibly to put your subjects at ease with a more easy-going posture, but for environmental shots using natural light I’d recommend going old-school: use two hands, look through the view finder, and hold a tight (but relaxed), stable stance. You won’t look as cool taking the photo, but you’ll get the better shot.  

HAND-HELD RULE

You might know the rule of thumb to use a minimum shutter speed of 1 over the focal length. For example, if you’re shooting with a 50mm lens (on a full frame camera such as a Canon 5DSR), a shutter speed of 1/50 is the slowest recommended speed for a reasonably sharp photograph. (If you’re using a crop frame camera you need to first factor in how the crop factor affects focal length. For example a Canon 7D Mark II or a Canon Rebel T7i both have a crop factor of 1.6 which effectively magnifies the image by that amount. So a 50mm lens becomes 80mm - i.e. 50 x 1.6 = 80. In this case the minimum shutter speed is 1/80. Ok, no more math, I promise!) Let’s look at an example and see how this works in practice. We’ll assume that we do not want any creative blur and would like the photo sharp throughout. 

Our location is the former mining town of Shifen, Taiwan. A slow moving train passes right through the center of the village, as it has for nearly 100 years, but these days it is carrying tourists, not coal. We’re using a Canon EF 24-70mm lens, which is my primary workhorse lens for travel photography.  We’ll use a focal length of 70mm for an image of the train passing through the colorful main street - it’s safest to keep some distance from the tracks and zoom in. Notably, this lens does not have built-in image stabilization, so it’s a good test of the hand-held rule. Based on the focal length of 70mm, our shutter speed is 1/80 (the nearest increment to 1/70), and it produces a decent image. If we zoom in however, many parts of the image are soft, and the moving train is outright blurry. No amount of post-process sharpening will make this image usable in any reasonably large size. The best we can do is process this image for low resolution use, such as Instagram (or a photography blog!)

Our first attempt might be Insta-ready but it won’t cut it for a larger size image. The train simply is not sharp (our desired look), nor does it have much motion blur (an alternative look). It's neither here nor there. (Aperture: f/8.0, Shutter: 1/…

Our first attempt might be Insta-ready but it won’t cut it for a larger size image. The train simply is not sharp (our desired look), nor does it have much motion blur (an alternative look). It's neither here nor there. (Aperture: f/8.0, Shutter: 1/80, ISO: 320)

Luckily, we’re going to get another crack at it, because the train that just passed through town is going back in the opposite direction shortly. This time we are going to increase the shutter speed to 1/320. The shorter exposure requires us to let in more light, but we don’t want to widen the aperture because this will create too shallow a depth of field. Instead, we’ll meter the scene and take a few test shots with a higher ISO while waiting for the train to return. And here’s what’s key: 1) if you have time, take a few test shots to get the exposure right before the scene unfolds. 2) Don’t force a low ISO shot at the expense of sharpness. It’s true that higher ISO introduces more noise, but today’s cameras produce clean images at higher ISO and there’s always the possibility to reduce noise in post-processing. In this instance a low ISO 100 shot requires either too slow a shutter speed or too wide an aperture for this scene… so we’ll go with ISO 1000, f/8 and shutter 1/320.  

PHOTOGRAPHY IN THE RAIN

We’ve got some other challenges too. It is raining and we need to keep our lens dry. You should always keep a UV filter on to protect the lens when shooting hand-held except in very specific situations. A lens hood is very effective in all but the heaviest rain. If you’ve got a weather sealed camera and lens, light rain or snow won’t be a problem, but it’s still a good idea to keep your gear dry. Buy a lens coat and if you don’t have one, improvise: a plastic bag will help in a pinch. 

Now let’s look at the result. Much sharper! You can easily read the numbers on the train.

This is a crop of the train magnified to 200%. (Aperture: f/8.0, Shutter: 1/320, ISO: 1000) Minor noise-reduction was applied using Topaz DeNoise.

This is a crop of the train magnified to 200%. (Aperture: f/8.0, Shutter: 1/320, ISO: 1000) Minor noise-reduction was applied using Topaz DeNoise.

It turns out the hand-held rule is a guideline, not a prescription. There are many factors which would require you to keep a faster shutter speed than 1 over the focal length. Let’s review some of them:

  • Camera Shake Part I: Note whether your lens includes image stabilization. If it does not, increase your minimum shutter speed.

  • Camera Shake Part II: Consider your technical ability. Are you experienced shooting hand-held and have you practiced the skill recently? Bump up your shutter speed if you’re rusty, and feel no shame about it.

  • Situational Awareness: Evaluate the shooting situation. Are you calmly waiting for a moment, or did you just run to catch an unfolding scene, and your heart is pounding from the exercise and adrenaline? Can you pull off a stable hand-held shot? In high energy situations, crowded places, or bad weather this is unlikely, and you should raise your minimum shutter speed to compensate.

  • Moving Subjects: Visualize the scene. Are you freezing moving subjects, or capturing a still life scene? Even slow moving subjects require a shutter speed greater than the hand-held minimum. Faster subjects need even faster shutter speeds. And remember that stationary subjects are not always still (i.e. trees on a windy day.)

An example of a blown shot. I hand-held a Canon 1DX Mark II with a 600mm lens for this shot (mistake number one - hand-held shots with very long lenses are very difficult to pull off), and thought if I used a shutter speed of 1/1600 that should be p…

An example of a blown shot. I hand-held a Canon 1DX Mark II with a 600mm lens for this shot (mistake number one - hand-held shots with very long lenses are very difficult to pull off), and thought if I used a shutter speed of 1/1600 that should be plenty fast since the hand-held rule would call for only 1/600 right? Not even close. The eagle’s eyes are not sharp - which makes this shot unusable, except to demonstrate an unusable shot 😀 To get this right, the ideal shutter speed would have been 1/3200. On a tripod and gimbal, with image stabilization, steady hands, and good panning technique, 1/2500 might work. Maybe.

I have missed plenty of opportunities to capture portfolio shots because I underestimated the shutter speed needed for a sharp image. Like any photographic skill, hand-held photography takes practice and is a combination of art and science. Most importantly, go out there and have fun while you learn.

The Shot: The Blizzard Taxi

The Shot: The Blizzard Taxi
Techniques: Panning
Skill Level: Intermediate
Location: New York City
Recommended knowledge: Setting your camera’s aperture, shutter speed, and ISO. Changing the autofocus mode and setting autofocus point. Enabling hi-speed or burst mode.

Focal length: 50mm, Aperture: F/2.8, Shutter: 1/40, ISO: 200

Focal length: 50mm, Aperture: F/2.8, Shutter: 1/40, ISO: 200

Even in depths of winter New York City just does not stop going. With this shot we’ll capture the action of New York in a snowstorm. The obvious subject is a moving taxi, but equally compelling is the falling snow and blustery weather. Shooting this image relies on the panning technique and using shutter speed as an artistic tool. We’ll frame color against a neutral background and washout the canvas with a vignette to further draw the eye to the main part of the image. 

SHUTTER SPEED
If you have a strong understanding of shutter speed feel free to skip this section. If this is new to you or you’d like a refresher, let’s review: the shutter speed of the camera controls how long the shutter is open to allow light to travel in to the camera’s sensor. The longer the shutter speed, the more light enters the frame. If the shutter speed is too fast, not enough light enters and the photo is underexposed; too slow, and the photo will be overexposed. When you photograph a stationary scene, shutter speed affects only the exposure and does not impact the appearance of the subject. 

Shutter speed can also be used to control the appearance of motion in an image. A fast shutter speed will “freeze” motion and appear as a crisp moment in time. With a slow shutter speed, motion will appear more fluid and blurry. In a very long exposure, motion may appear as a trail, or may disappear completely from the frame. All of these shutter speeds have applications in photography depending on the desired effect. In this image, the goal is to capture motion with a moderate blur. If we were to hold the camera stationary (or use a tripod) using a medium shutter speed, the passing taxicab would appear blurry against a sharp background as the camera captures a short distance of motion. However, in this image, using the panning technique we will reverse the effect by capturing the taxicab sharply and blurring our background. This is a popular look in auto racing and sports photography. It’s also common in nature photography, especially for birds in flight. As a bonus, the shutter speed will also blur and illustrate the movement of the falling snow.

PANNING 
Panning is not difficult, but it takes practice and requires an understanding of shutter speed to give the desired results. To illustrate what we will accomplish with panning, let’s use a simple example. Hold a pen or pencil at eye level, about 8-12 inches diagonally in front your right ear. Look straight ahead and take note of what is in the background (it could be a wall in your home). Now continue to look straight at the background ahead and move the pen across from right to left so that it stops 8-12 inches diagonally in front of your left ear. The entire motion should take 1 to 2 seconds. Notice that the pen appears blurry and the background remains sharp. This is what a medium shutter speed would capture when the camera is stationary - for example a camera on a tripod as a taxi cab passes from right to left.  (If you find that the pen was sharp and the background was blurry you’ve unknowingly used the panning technique. Let’s try it officially now.)

The traditional use of shutter speed to create motion blur. In this image, the camera is stationary on a tripod, keeping our background still while blurring moving subjects. In panning, the opposite effect is achieved. I used a tilt-shift lens in th…

The traditional use of shutter speed to create motion blur. In this image, the camera is stationary on a tripod, keeping our background still while blurring moving subjects. In panning, the opposite effect is achieved. I used a tilt-shift lens in this shot, but any lens can achieve motion blur at the right shutter speed.
Focal length: 24mm, Aperture: F/14, Shutter: 1/15, ISO: 100

Now we are going to reverse the effect. Hold the pen at a diagonal 8-12 inches from your right ear at eye level. This time, turn your head to the right so that you are looking directly at the pen. Move the pen from right to left, just as before but this time follow the pen by turning your head at the same speed so that you are always looking straight at the pen as it moves. Notice the pen remains in focus as the background appears blurry throughout the movement. We apply this effect to our photo by moving our eyes (camera) with the the subject (taxi). 

Panning works most effectively when a subject is moving perpendicular to your frame of reference (i.e. side to side). What is the optimal shutter speed to achieve this effect? The answer really depends on two things: the focal length and the speed of the subject. Both of these factors affect how quickly motion appears in frame. To keep it simple, lets assume a focal length of 35mm on a full frame camera. A shutter speed between 1/30 and 1/125 generally works for passing cars, bikes, etc. In this photo the taxi is driving relatively slowly (as one should in a blizzard!); I used a Canon EF 24-70 f/2.8L II lens with a focal length of 50mm and shutter speed 1/40. As a bonus, the taxi is driving upwind and in the opposite direction of the falling snow. This adds an enhanced sense of movement to the image.

The easiest way to practice panning is to stand on a sidewalk and photograph passing cars. If your camera supports burst mode or hi-speed shooting you should enable this setting. Select Shutter Priority or Manual mode and start with a shutter speed of 1/60. Hold your camera at eye level and tuck your elbows in against your sides. (You can also use a tripod and panning head, but I suggest learning to do this hand-held). As a car approaches from the side, turn your entire torso toward the car, focus, and begin turning your core as the car passes. Practice turning your body at a speed so that the car remains in the same part of the frame throughout. Do this a few times before taking any shots. When you are ready, pan and hold down your shutter button to take multiple shots as a car passes. Be sure to press your shutter button before the subject is directly in front of you - you'll miss the shot if you wait until the subject is in front of you to begin shooting. The goal is to have the car in focus and the background blurry. If both appear relatively sharp, your shutter speed is too fast. If both are blurry your shutter speed may be too slow. If the car’s position in the frame is inconsistent, you need to fine tune the speed at which you're  turning. Panning is a complex technique that will take practice, so don’t be discouraged if it takes a while. One final note of caution: always pick a safe place from which to attempt this technique. Do not stand in the street and always be aware of your surroundings! 

Want to learn more about motion blur? Check out these 10 Great Tips to Capture Unique Motion Blur Photos.

FOCUS
On my Canon 5D Mark III you have three options: One Shot, AI Focus, and AI Servo. Comparable Nikon models have similar modes. If you are panning against a busy background, using Servo mode will be effective if you lock focus on the moving vehicle properly. I often use One Shot mode and have no problem. The key is to not enable all focus points. Doing so could cause the camera to lock focus on another moving object and not your preferred subject. Limit the autofocus to no more than a few points surrounding the center of the frame.

Limit your autofocus to the points in the center of the frame. Enabling more focus points could confuse the camera's autofocus and lock onto the wrong subject, especially in an action scene. (Image courtesy: Canon USA)

Limit your autofocus to the points in the center of the frame. Enabling more focus points could confuse the camera's autofocus and lock onto the wrong subject, especially in an action scene. (Image courtesy: Canon USA)

COMPOSITION
Whenever you capture motion, the framing of the subject should help to accentuate the movement. In practical terms, you should leave room in front of and behind the subject to imply movement, sometimes with visible cues like a wake or a dust cloud. (Think of cartoons and how they suggest movement). Generally you should leave more room in front of the subject than behind to imply forward movement. 

POST-PROCESSING
In post-processing I applied two effects to achieve the final look. First, I applied a polarization filter (using Nik Collection Polarization) to make the yellows and blues pop. Second, I added a vignette to draw the eye to the center of the frame. Vignettes can be created in a number of ways and normally they darken the corners of the image, however in this instance I used a curves adjustment layer in Photoshop to lighten the corners and reduce contrast. I limited the effect to the perimeter of the image, creating a fade into the whiteout of the snow storm. 

OTHER SUBJECTS
Panning can be used to capture motion on almost any moving subject but requires certain qualities in the movement:

  1. The subject should be moving perpendicular to you - i.e left-right or right-left

  2. The subject should be moving continuously and smoothly

Practice and have fun! Try the panning technique in these situations:

  • A cyclist at the park

  • A seagull at the beach

  • A motorcycle or car on the street

  • A runner in a race

  • A waverunner or water-skier at a lake

Panning technique in Taipei, Taiwan. Scooters are so popular in this city, they are often seen driving in “swarms” or parked by the dozens.  Focal length: 70mm, Aperture: F/2.8, Shutter: 1/200, ISO: 250

Panning technique in Taipei, Taiwan. Scooters are so popular in this city, they are often seen driving in “swarms” or parked by the dozens.
Focal length: 70mm, Aperture: F/2.8, Shutter: 1/200, ISO: 250